官网 github:http://github.com/redis/redis
offical-website:https://redis.io/
民间教程:https://www.runoob.com/redis/redis-tutorial.html
简介
官方说明:Redis is an open source (BSD licensed), in-memory data structure store, used as a database, cache, and message broker. Redis provides data structures such as strings, hashes, lists, sets, sorted sets with range queries, bitmaps, hyperloglogs, geospatial indexes, and streams. Redis has built-in replication, Lua scripting, LRU eviction, transactions, and different levels of on-disk persistence, and provides high availability via Redis Sentinel and automatic partitioning with Redis Cluster.
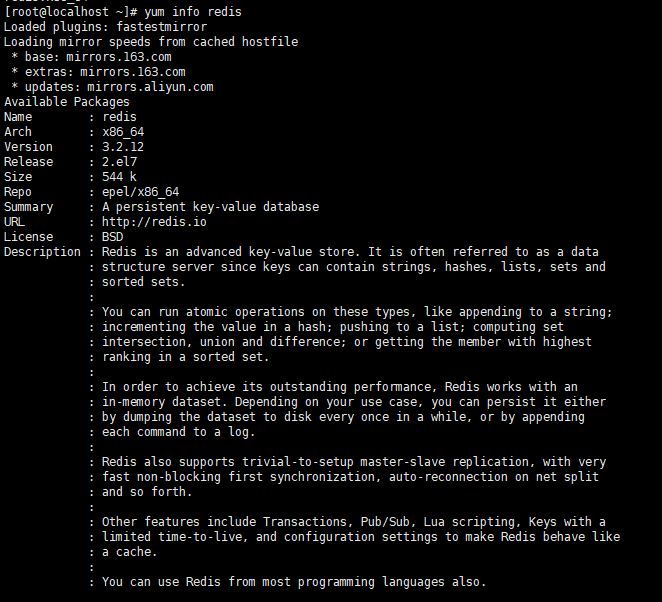
Redis在CentOS官方YUM-BASE源仓库中是没有的,但在EPEL源仓库中虽然是有的,但是版本太低了,是个3.x.x的版本(如下图);而且,Redis官网是已经没有提供二进制包。所以建议使用源码安装。
源码编译安装 1. 准备 下载应用包
上传应用包 1 scp redis-6.2.4.tar.gz root@xxx:/usr/local/src/
解压应用包 1 2 cd /usr/local/srctar -zxvf redis-6.2.4.tar.gz
安装相关工具 切换GCC版本 高版本的Redis需要更高版本GCC版本来进行源码编译,所以需要提高GCC版本。
通过工具devtoolset实现GCC版本切换
1 2 3 4 5 6 7 8 9 10 11 yum install -y centos-release-scl yum install -y devtoolset-7 scl enable devtoolset-7 bash
再次查看当前版本:
2. 源码编译并修改配置文件 源码编译 1 2 make distclean make install
创建相关目录及复制配置文件 1 2 3 4 mkdir -p /usr/local/redis/etcmkdir -p /usr/local/redis/logmkdir -p /usr/local/redis/datacp /usr/local/src/redis-6.2.4/redis.conf /usr/local/redis/etc/redis.conf
修改配置文件 1 vi /usr/local/redis/etc/redis.conf
1 2 3 4 5 6 7 8 9 10 11 12 # 监听所有IP bind 0.0.0.0 # 启动后台运行模式 daemonize yes # 配置进程信息文件路径 pidfile /usr/local/redis/redis.pid # 配置日志文件路径 logfile /usr/local/redis/log/redis.log # 配置数据持久化路径 dir /usr/local/redis/data # 配置访问密钥 requirepass xxx
3. 启动服务 1 redis-server /usr/local/redis/etc/redis.conf
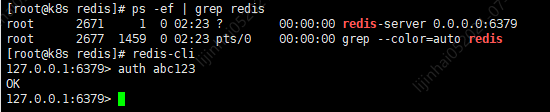
4. 验证服务 1 2 3 4 ps -ef | grep redis redis-cli
5. 开放端口 1 2 firewall-cmd --zone=public --add-port=6379/tcp --permanent firewall-cmd --reload
主从配置 1. 准备Redis从库 安装方式和上述源码编译安装一致,配置文件也一并修改,除了上述的配置属性外,还需要修改下面属性
1 vi /usr/local/redis/etc/redis.conf
1 2 3 4 5 6 # 配置主库的IP和端口 replicaof xxx_ip xxx_port # 配置主库的验证密钥 masterauth xxx # 如果从库允许写操作,配置非只读,默认是只读 # replica-read-only no
2. 启动从库服务 1 redis-server /usr/local/redis/etc/redis.conf
哨兵配置 1. 创建哨兵服务相关目录及复制哨兵服务配置文件 1 2 mkdir -p /usr/local/redis/data-sentinelcp /usr/local/src/redis-6.2.4/sentinel.conf /usr/local/redis/etc/sentinel.conf
2. 修改哨兵服务配置文件 1 vi /usr/local/redis/etc/sentinel.conf
1 2 3 4 5 6 7 8 9 10 11 12 13 14 15 16 # 监听所有IP或直接禁用保护模式 # protected-mode no bind 0.0.0.0 # 启动后台运行模式 daemonize yes # 配置进程信息文件路径 pidfile /usr/local/redis/redis-sentinel.pid # 配置日志文件路径 logfile /usr/local/redis/log/redis-sentinel.log # 配置数据持久化路径 dir /usr/local/redis/data-sentinel # 配置哨兵服务监听主库的信息 # 这里sentinel monitor代表监控;mymaster代表服务器的名称,可以自定义;1代表只有一个或一个以上的哨兵认为主服务器不可用的时候,才会进行failover操作。 sentinel monitor mymaster <主库IP> <主库端口> 1 # 配置主库验证密钥 sentinel auth-pass mymaster xxx
3. 启动哨兵服务 1 redis-sentinel /usr/local/redis/etc/sentinel.conf
4. 开放哨兵服务端口 1 2 firewall-cmd --zone=public --add-port=26379/tcp --permanent firewall-cmd --reload
Redis服务开机自启动 1. 配置自启动文件 1 vi /usr/local/redis/etc/redis.service
1 2 3 4 5 6 7 8 9 10 11 12 13 14 [Unit] Description=Redis-Server After=network.target [Service] Type=forking PIDFile=/usr/local/redis/redis.pid ExecStart=/usr/local/bin/redis-server /usr/local/redis/etc/redis.conf ExecReload=/bin/kill -s HUP $MAINPID ExecStop=/usr/local/bin/redis-cli -p `cat /usr/local/redis/etc/redis.conf | egrep '^port' | awk '{print $2}'` -a `cat /usr/local/redis/etc/redis.conf | egrep '^requirepass' | awk '{print $2}'` SHUTDOWN PrivateTmp=true [Install] WantedBy=multi-user.target
2. 软链到系统服务目录 1 ln -s /usr/local/redis/etc/redis.service /etc/systemd/system/
3. 设置开机自启并启动服务 1 2 systemctl enable redis.service systemctl start redis.service
4. 查看服务状态 1 systemctl status redis.service
结果截图:
哨兵服务开机自启动 1. 配置自启动文件 1 vi /usr/local/redis/etc/redis-sentinel.service
1 2 3 4 5 6 7 8 9 10 11 12 13 14 [Unit] Description=Redis-Sentinel-Server After=network.target redis.service [Service] Type=forking PIDFile=/usr/local/redis/redis-sentinel.pid ExecStart=/usr/local/bin/redis-sentinel /usr/local/redis/etc/sentinel.conf ExecReload=/bin/kill -s HUP $MAINPID ExecStop=/usr/local/bin/redis-cli -p `cat /usr/local/redis/etc/sentinel.conf | egrep '^port' | awk '{print $2}'` SHUTDOWN PrivateTmp=true [Install] WantedBy=multi-user.target
2. 软链到系统服务目录 1 ln -s /usr/local/redis/etc/redis-sentinel.service /etc/systemd/system/
3. 设置开机自启并启动服务 1 2 systemctl enable redis-sentinel.service systemctl start redis-sentinel.service
4. 查看服务状态 1 systemctl status redis-sentinel.service
结果截图:
SpringBoot中使用 1. 引入依赖 1 2 3 4 5 6 7 8 9 10 <dependency > <groupId > org.springframework.boot</groupId > <artifactId > spring-boot-starter-data-redis</artifactId > </dependency > <dependency > <groupId > org.apache.commons</groupId > <artifactId > commons-pool2</artifactId > </dependency >
2. 修改SpringBoot配置文件(application.yml或application.properties) 单服务Redis 1 2 3 4 5 6 7 8 9 10 11 # 配置Redis信息 spring.redis.host = <Redis服务IP> spring.redis.port = <Redis服务端口> spring.redis.password = <Redis验证密钥> spring.redis.database = <Redis数据库索引(0-15)> spring.redis.timeout = 20000 spring.redis.lettuce.pool.max-active = 8 spring.redis.lettuce.pool.min-idle = 1 spring.redis.lettuce.pool.max-idle = 8 spring.redis.lettuce.pool.max-wait = 600000ms spring.redis.lettuce.pool.time-between-eviction-runs = 900000ms
哨兵模式Redis 1 2 3 4 5 6 7 8 9 10 11 # 配置Redis信息 spring.redis.database = <Redis数据库索引(0-15)> spring.redis.timeout = 20000 spring.redis.lettuce.pool.max-active = 8 spring.redis.lettuce.pool.min-idle = 1 spring.redis.lettuce.pool.max-idle = 8 spring.redis.lettuce.pool.max-wait = 600000ms spring.redis.lettuce.pool.time-between-eviction-runs = 900000ms # 配置Redis哨兵服务信息 spring.redis.sentinel.master = <哨兵配置文件配置的主库服务名,默认是mymaster> spring.redis.sentinel.nodes = <哨兵服务IP1>, <哨兵服务IP2>
3. 注入RedisTemplate或StringRedisTemplate对象 1 2 3 4 @Autowired private RedisTemplate<String, Object> redisTemplate;@Autowired private StringRedisTemplate stringRedisTemplate;
(•̀ᴗ•́)و ̑̑